Thursday, January 29, 2015

Gallery Wall- How to:

a few weeks ago i shared that we were working on turning the front office into a playroom and even posted a fun mood board. well the projects are slowly and surely coming together and i am so excited for how it is coming together. i can't wait to share pictures of the entire room when it's completely done!  until then, be on the look out for some fun tutorials because there's a lot of DIY going on in that room.

as with any 'finished' room in my house, i just knew that it needed a gallery wall full of fun art, family pictures and sentimental touches. the first gallery wall that i did in our living room was a bit overwhelming, so i figured i'd share all the mistakes tips i've learned a long the way.

the first thing you want to do is gather all of your frames, art, and objects that you want on your wall.  try to think out of the box and add in fun items that you wouldn't expect. i know it's overdone in decorating and totally not original, but i really wanted ours to include a faux taxidermy in ours-- so i did. no shame. but anyway, be sure to collect your things over time. the more random (& cheaper!), the better. it will come together in a cohesive grouping, i swear.


now, my no fail, can't mess it up, suggestion. trace all your pieces onto paper before you pick up that hammer and nails. i simply grabbed some leftover rolls of wrapping paper and outlined everything. this way, you can tape them up to the wall and mess with the placement until you're happy. you will save yourself (or your husband) a lot of time spackling and painting over misjudged nail holes.


when working on the placement of your art, start from the top. i like to find the height i want and work my way down. this way you won't be trying to fit items into awkward blank space in the middle of the wall- i've been there, no fun.  for this gallery wall, i decided to work off the door trim because i wanted to keep everything on a parallel line.


now tape them up. play with your placement until you're happy! here's what mine looked like:


okay, now comes the part that makes this so EASY, it's idiot proof. before i started to do this, i really struggled with placing the nail in the correct place- so my picture would always hang just a smidge off from where i really wanted. okay, are you ready to have your mind blown? turn the back of your picture over and make not of where the hanging hardware is located. (you can measure if you are feeling especially anal, but i usually eye ball it.) now notice in the picture below, some of my paper had graphed lines in .5 inches. totally on accident, but it made this portion so simple.  even if yours doesn't, find the center of your cut out and drop down to about where your hanging hardware was and drive that nail into the wall. 


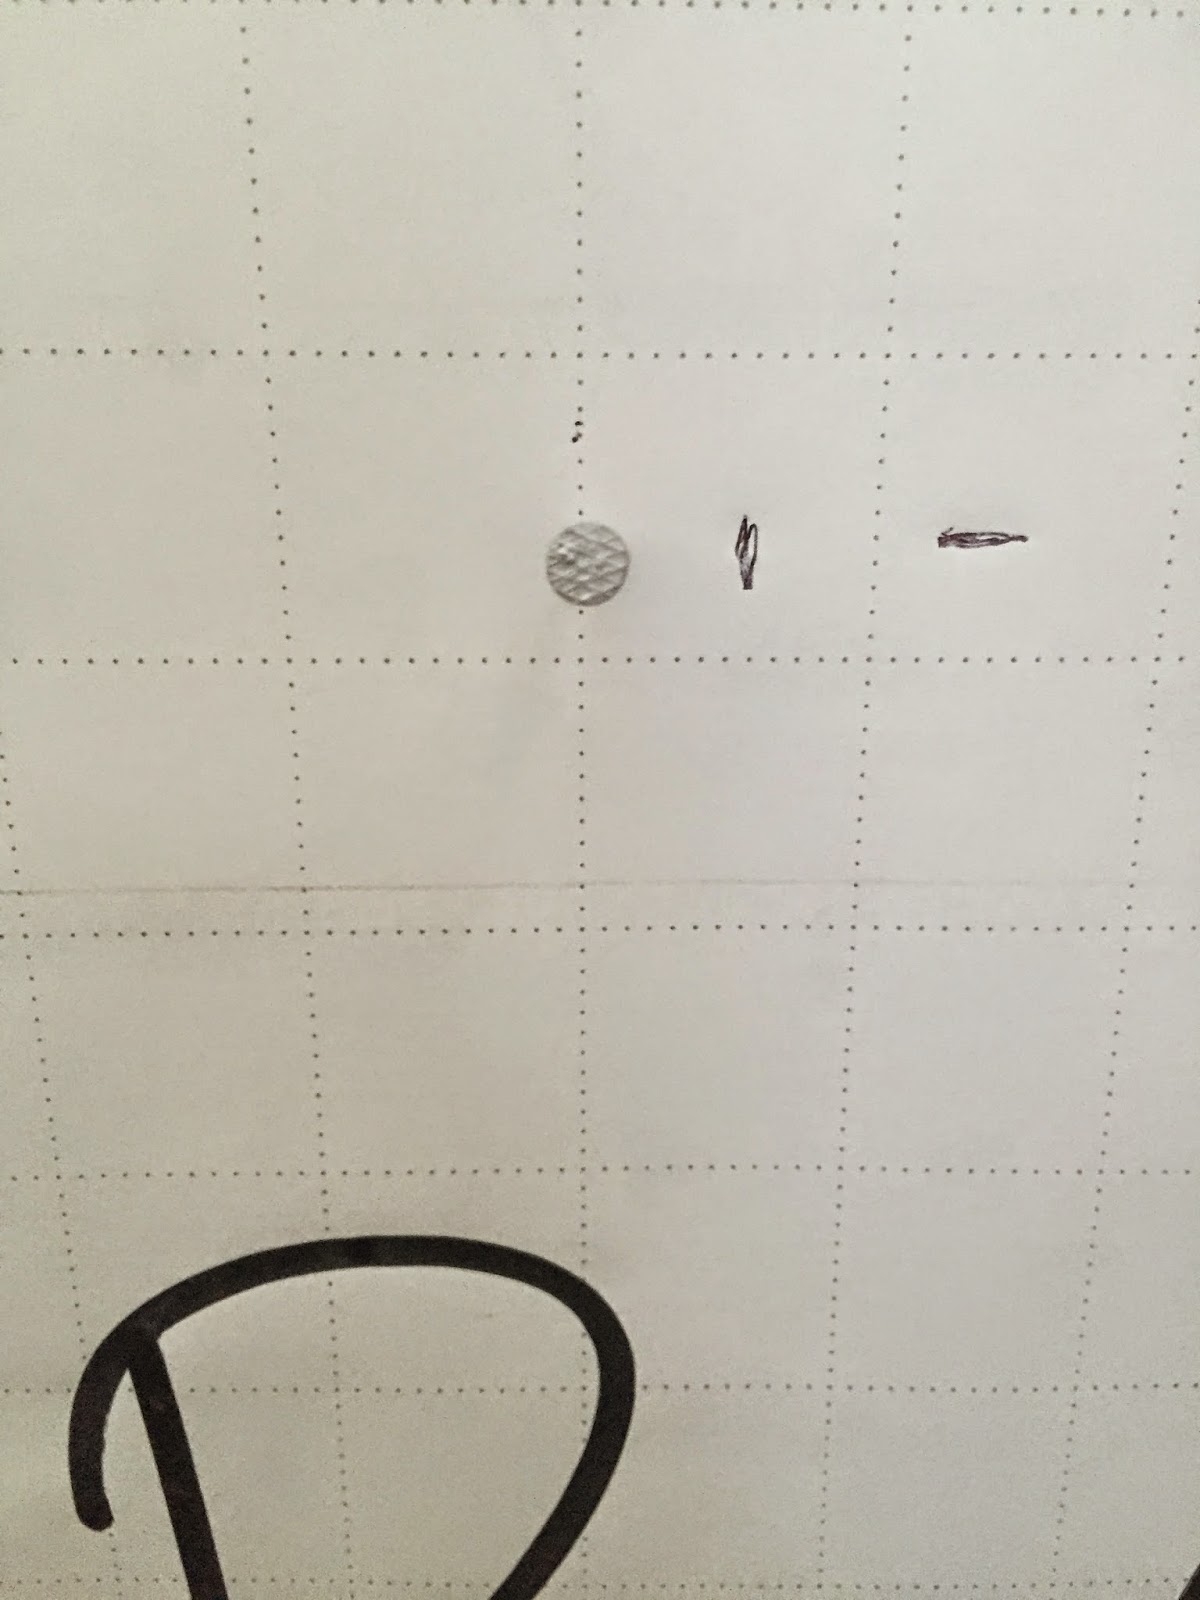
you can go ahead and nail all the way if you want-- but then you'll have to rip off your paper template around the nail.  i like to just push the nail into the wall to leave a hole. this way, if it's not in a place you're happy with you can simply start over. (don't judge my disgusting nail polish). 


when you're sure, hammer the nail into the wall and hang your photo! keep it up with the rest of the pieces that will make up your wall.


when you're finished, you will have something that looks like this! i still need to get some family photos printed for some of the blank frames mixed in there, but i am absolutely thrilled with how it came out.


in full disclosure, i used to be one of those people who needed each frame to be exactly level and parallel to what was next to it. but i kind of let that go for this project and i am so glad that i did. firstly, it made the project go a million times faster and secondly, it was much more enjoyable with a kind of care-free (and kid friendly) attitude.  when hanky is jumping on the furniture or throwing a football inside, i am not going to worry if something gets moved or knocked over. this room is for him to play, explore, and learn.  i hope that these items inspire him to embrace his wonderful self.


love,  sarah


Friday, January 23, 2015

Thursday, January 22, 2015

Captiva Island, FL

apologies in advance for the photo overload. we had the best week in florida with my family. it was just what the doctor ordered before my first week back at work.


^^ could not have made it through the flight with out my solly wrap. hanky goes comatose when he's in there. thank you solly, from my family and the entire plane! ^^


^^ boating tours and fishing. that's pine island in the background ^^


^^ first catch of the day! ^^


^^ showing hanky my fish, he wasn't impressed ^^


^^ enjoying lunch at south seas island resort ^^


^^ this guys face, my heart is exploding ^^


^^ dipping our feet in the pool ^^


^^ this guy jumped on my swimsuit! ^^


^^ hanky enjoying his meal al fresco ^^


^^ ocean fishing at sunset ^^


^^ my favorite men in the world ^^


our trip to florida is exactly what i needed.  we had such a good week together and i was able to soak up every moment with my baby boy.  josh liked to remind me that i was on limited time until i was back at work, but it helped me take advantage of the extra snuggle time. 

traveling with a babe in tow was definitely a new experience, but everything went great.  i can't wait until our next family of three adventure. 


love, sarah 

Wednesday, January 14, 2015

Hanky's Valentines Style

valentines day is now a month away and i already have a date with the cutest little valentine around.  since october we have already celebrated so many holidays with hanky, but for some reason i am most excited for v-day. maybe it's because i can't wait for henry to give his momma some unrequited love, but his slobbery 'kisses' will definitely do for now.

regardless, what could be better than a day that i can spoil this little man with lots of love? but by those standards, every day would be valentines day.


Hanky's Valentines Style


 Clifford's First Valentines Day Book -- Henry in Love Book -- Heart Hat -- Heart & 'I Love You' Teethers -- Bla Bla Kids MiniLondon Dog -- Color-Block Fleece Hoodie -- Red Gingham Shirt -- Plaid Cuff Jeans -- Red Laceless Sneakers


who said valentines day is for the girls? this little guy is going to look so dapper in this cute outfit. also, we are totally loving the book Henry in Love, a sweet story about a cat named henry who has a big time crush on a little bunny named chloe. this will be our go to bedtime story all month long. 


love, sarah


Monday, January 12, 2015

Bon Voyage!

i need a vacation, y'all. and it comes at the perfect time: we leave for florida in the morning, but that also means that i am in the final week of my maternity leave. no bueno.

our schedule has been all types of jacked up for the last few days and i'm hoping that traveling tomorrow won't send us all over the edge.  when we get to sunny florida we are implementing daytime naps in the crib and a flexible schedule. these cat naps are making us all crazy.


hoping the travel gods bless us with a happy baby tomorrow. 


love, sarah 

Thursday, January 8, 2015

Postpartum necessities

we must be hardwired to forget. it's why women have more than one baby.  i gave birth to hanky about ten weeks ago, and i'm already forgetting.  it wasn't that bad, right? for the most part, no... but there were moments. here is what helped me most during the worst of it.


Postpartum necessities


some unsolicited advice: 

stay on top of your pain, take tylenol or advil (whatever your doc says!) every 4 hours. you probably will be prescribed some type of narcotic pain reliever. be wary, while it may help, you will get constipated.

start taking colace,  like yesterday. the constipation you will experience post delivery is no joke- physically or emotionally. your first poop will be a lot scarier than actual labor.

speaking of delivery, they say if you feel like you're going to poop, you're doing it right. which is why the preparation h and tucks pads will come in handy. enough said.

remember your big underwear we talked about here? it's size will come in handy when you put your ice packs down there.

get some maxi pads in varying sizes- overnight, heavy, regular, light. get the unscented ones! i didn't pay attention and the burning was unbearable. you will probably need these for about a month, so stock up accordingly.

take a luke warm bath everyday. add some epsom salt and try to relax.  it will help a lot with the burning and itching.

have a perineal bottle in each bathroom and make sure you fill it with warm water each time you use the toilet.  then use a hair dryer on the low and cool setting, dry your area. spray dermoplast all over your new pad and pull up those too big undies.

stay hydrated: it will help you establish your milk supply and it will also dilute your urine. diluted urine = less burning when you pee.

when people say that breastfeeding doesn't hurt they are lying to you. it's even more offensive when they say 'it shouldn't hurt if you are doing it right'- now that's a bold face lie. sure it will get better and doesn't hurt forever, but at the beginning your nipples will feel like they are on fire. you will also get some pretty bad cramps as your uterus continues to contract. do yourself a favor and slather on the lanolin each and every time.

when your milk comes in it hurts. you will feel like your have rocks in your boobs. they will be veiny and shiny. newborns can't take enough milk to empty your breasts completely, so you'd do best to pump after each feeding. my electric pump was delayed being shipped by the insurance, so my mom picked up the Medela Harmony Pump. This manual pump was a godsend.

put the round ice packs on your boobs. it will feel amazing. 

a quick tip- let your boobs air dry after a feeding and before you put on the lanolin, breast pads, and bra. it's important because no one wants thrush.

get walking: the fresh air will make you feel better. you will feel like a normal person. go slow.

and grab everything from the hospital: the mesh undies, the chux pads, extra large maxi pads, dermoplast-- whatever they have, you should take. 

 y'all, to be honest, it's not THAT bad. there are moments where you will not believe that the burning and later the itching will ever stop. but it will. be prepared and take it easy. lay on the couch and cuddle with your baby. let other people cook and clean your house. you will forget. and you will probably want to do it again.


love, sarah

Wednesday, January 7, 2015

Sleeping through the night


i woke up in a startle this morning at 6:52 AM. i was so rested i thought there must be some mistake. i quickly checked the monitor to make sure that it was still on (i'm totally guilty of once forgetting to plug it in and woke to it dead) and it was. hanky was still fast asleep. thank god because i needed to go pump- it was an emergency.

about twenty minutes later, i saw him kicking around-- love when he wakes up super smiley and happy. 

today is going to be a great day. 


love, sarah 

Tuesday, January 6, 2015

chicken & spinach pasta bake: a pinterest recipe

i'm embarrassed to admit it, but josh and i have been eating terribly for the past 2.5 months. and by terrible, i mean one night we just had canned vegetables because we were too tired/lazy to go to the store. it usually is not that bad, but we have done a lot of ordering pizza or eating just whatever we can find in the panty (which isn't much).

i wish i could blame it on having a new baby, but i think we just got into some bad habits. i love to cook, but it always seems that i have been nursing henry or giving him a bath or doing something when i would/should be cooking dinner.

so here's a little new years resolution. have an actual, sit-down, home made meal most nights. i think it will give josh and i some time together and help knock off those stubborn 10 pounds of pregnancy weight.

last night, i got my butt into the kitchen and tried a new recipe, found on pinterest of course. this chicken & spinach pasta bake by heather over at my life well loved, has been pinned like a million times on pinterest and for good reason- it's delicious!

I made a few tweaks, so heres my take on it:

Ingredients
  • 8 oz uncooked rigatoni pasta
  • 1 T evoo
  • 1/2 medium white onion- chopped
  • 10 oz frozen spinach, thawed & drained
  • 1 (smallish) package of skinless boneless chicken breasts, boiled and shredded
  • chicken broth
  • 1 (14 oz) can of italian-style diced tomatoes, undrained
  • 1 (8 oz) container of Philadelphia chive and onion cream cheese
  • salt & pepper to your taste
  • 2 cups shredded mozzarella cheese
  • grated parmesan cheese, to taste 

Directions

1. place chicken breasts in a saucepan and cover with chicken broth. bring to a boil, cover and reduce to a simmer until chicken is thoroughly cooked. cook time will depend on how thick the breasts are. to check, cut into the thickest part of the breast and make sure there is no pink
2. remove breasts from saucepan and set aside. DO NOT DISCARD broth. add your pasta and bring to a boil.
3. while pasta is cooking, shred chicken and set aside.
4. spread evoo at the bottom of a 11x7 baking dish and add chopped onions. bake at 375 degrees for about 10-15 minutes (until onions brown)
5. in the meantime, combine remaining ingredients: spinach, tomatoes, cream cheeses, s&p, & 1.5 cups of mozzarella cheese into a large mixing bowl. Add cooked pasta, chicken, and onions.
6. mix well and spoon mixture back into baking dish
7. cover with remaining mozzarella cheese and parmesan
8. bake at 350 for about 20 minutes until cheese is slightly browned and bubbly- everything is cooked, so you are just heating it up.
9. serve & enjoy


it was delish! next time i will try to get a pic before josh digs in (and yes, that was after he took a hearty portion for himself).  this recipe will probably serve a family of 4-6, depending how many big eaters you have.

stay tuned for more easy recipes and reviews of some pinterest favorites! ps. please excuse my 'directions,' they make sense in my head ;)


love, sarah

Monday, January 5, 2015

Hospital Packing List

Hospital Packing List


my sweet friend, nicole, is expecting a baby in just a few weeks and we are getting so excited to welcome hanky's best bud into the world. yesterday she asked if i could share my hospital packing list with her, but instead, i will share what i WISH i packed for the hospital. i like to be prepared (read: horrible over-packer), but it ended up just being a pain for me my husband to carry all of our crap to and from the room. 

so let's get started.

for mommy:
- bring your pillow! but i would buy a cheap pillowcase for it because hospitals are gross (which will be a common theme throughout this post)
- a comfy robe. you will live in this for the next month, so treat yourself to a nice one. my favorite is this one from Nordstroms. 
- fuzzy socks and make sure they have no skid things on the bottoms (a requirment, so you don't sue the hospital when you fall on your ass). i like these
- prenatal vitamins: i'm sure the hospital has these, but i brought my own because they are gummies.
- comfy PJ's that button up the front. this is great for nursing and for when all of the doctors want to push on your belly for the next few days. i brought three pairs but only used two. 
- slippers because hospitals are gross (and oftentimes freezing). 
- any toiletries you will need. showering will make you feel human again, so do it as soon as you can. also be sure to throw some breast pads in there because you'll need them if your milk comes in... mine did and i had to use tissues stuffed into my bra. 
- a big, soft, absorbent towel. the hospital ones are tiny and itchy.  
- water bottle & snacks for after delivery (or the middle of the night). 
- flip flops for the shower. hospitals are gross. i threw mine away after. 
- underwear and probably the best advice ever: go to victoria's secret and get BLACK underwear that are about three sizes too big. get regular bikini or, better yet, cotton briefs. the black is good because you will bleed and if they're big you can fit your monster pad and ice pack in there. go ahead and get the 5/$27 deal and bring them all. 
- the best nursing bra ever. i brought three. 
- a going home outfit. remember, you will still have a belly! something that fit you around the middle of your pregnancy should work. 

for daddy: 
- any electronics to keep daddy busy and for sending out a birth announcement. we made a draft email with all of contacts already inputed and just hit 'send' once we personalized it after hanky's birth. 
- phone & device chargers. bonus points for extra long cords. 
- camera. let him take pictures. you can edit the ones that are a bit too "graphic," and i promise you will cherish them forever. the more the better. 
- hoodie & slippers: our room was freezing. 
- pillow (with own pillow case)
- comfy blanket
- toiletries 

for baby: 
truth be told, the hospital will have everything you need for your little one, but if you are like me, you will want to start playing dress up from day one. 
- bring your baby book! if you are nice to the nurses they may even stamp the babes footprints for ya!
- PJ's in a few different sizes (hanky only fit in the smallest of the newborn clothes, and at 7lbs he wasn't even that small). i liked the carter's fleece jammies for winter. 
- pacifier, we gave hanky one and never had a problem with nipple confusion.
- aden & anais swaddle blankets. they have so many purposes- i like to use it as a nursing cover! 
- these zutano booties are adorable and will keep your baby's feet toasty warm. 
- carseat, already installed. also, learn how to use it properly! i put a teddy bear in it and glad i did because i would have looked like a fool messing with the straps if i hadn't.
stroller blanket to keep baby cozy for the ride home. 


so there it is! make sure you grab everything from the hospital- diapers, wipes, blankets, burp clothes,  pads, ice packs, etc. my husband tried to take everything that wasn't bolted to the floor. stay tuned for a post-partum recovery guide and all the products you will want to have on hand! 


love, sarah

Thursday, January 1, 2015

2014 in review


don't know how 2014 will be topped, but we're willing to give it a shot! 

love, sarah

 
Blogger Template by Designer Blogs